And at that moment he knew…
And it was at that moment James (bleep) knew he had (bleep) up. So we got the new anchor up anytime you do something like this on a boat you always find something that there's a problem with
Our plan: replace the mystery anchor
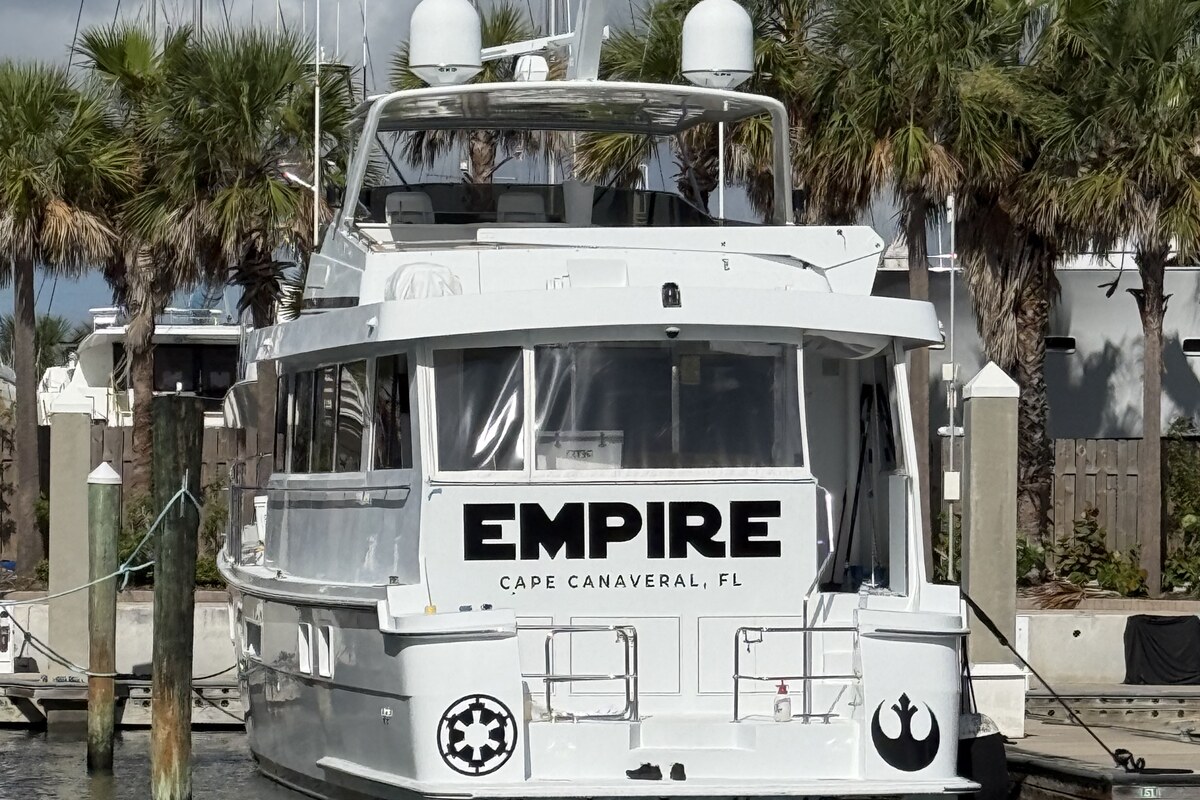
good afternoon from the bow of Empire today what we're thinking about doing is replacing this anchor that's pretty old and not the style that we want with a FX-125, which is a Danforth style anchor that's made by Fortress. It is the 75 pounds the 75 pound anchor which is the right size for our boat one of our items coming up next is taking this windlass apart we're doing some maintenance on it replacing a couple of gaskets adding new grease greasing the bearings and all that kind of stuff now this thing we haven't personally tested in about two and a half years. I didn't see it on the survey, but Trisha says she saw it operating on the survey. I kind of went around look down in the two in the chain locker which is right below this in front of our bow stateroom and actually we have a chain locker that split for this one So that is to throw a second anchor out. It's all rope the main anchor is all chain kind of questioning the quality of our chain as it exists right now there's a little bit of corrosion and rust on this part that's just been exposed to air and salt and all that stuff. So I kind of inquired well, I was kind of curious whether the whole chain was like that or it was just this part that had been exposed and lucky for us all once the chain goes down in the chain locker all that chain is super clean looks new I saw where somebody had started to mark the various distance marks on it at some point So what I'm gonna do is pull this anchor up manually myself get this unlatched and then probably have Trisha go down to the dock with a rope will attach it to the anchor and as I let it out will let the anchor down onto the dock with a bunch of chain and we'll attach our new anchor and put it back the new anchor is sitting on our aft deck right now. We got that we ordered that like it probably took like two weeks to get here which is pretty fast for boat stuff. So hopefully we get the new anchor on here do we plan to use it anytime soon? No but it's a hundred-pound box sitting on our aft deck picking up a lot of room and then what we'll probably do with this older style anchor is put it in our lazarette and keep it as a spare you know if we ever a lot of windage we could put it out here or use it as a stern anchor So we would have two anchors to keep the boat from swinging around too much. So let me do that real quick I'm just gonna loosen it because it stays attached to the windlass which is very smart through this right here that way when you're using the boat if this windlass failed it wouldn't just drop the anchor down in front of the boat and then you run over it which would obviously cause a lot of damage to the propellers and a whole slew of other problems
Testing a windlass after 2.5 years
So like I said, we haven't tested this in about two years. So I hope it works, but we don't know Okay So it works definitely sounds a little bit of it sounds very rough it probably has had no maintenance done on it for a very long time like said one of our next steps after replacing the anchor is to actually take that apart grease everything up replace gaskets and get that thing and back to a hundred percent. So pause there while we get everything all set up we got her down. Let's see if she'll go back up Yep, well, that's good to know it works sounds rough, but it'll get it'll be able to pull the new anchor up So let's pause there and then get set up.
Lowering the old anchor to the dock
All you gotta do is press the down button I'm gonna pull this over to the dock. Are you ready? Huh? Okay, a little bit more Okay, good is that too much no, that's perfect do you want a little extra slack on the line? Sure. Yeah a little bit more out a little bit more Okay, good good you need some help down there So now what we've done is Trisha lowered the anchor down with the windlass onto the ground
The clevis, and an anchor we've never seen
now I need to undo the clevis here on the end of the anchor we may actually end up replacing this portion right here with a secondary clevis because when the anchor's in the water and it's holding and the boats actually putting strain on it. This is kind of the weakest spot here I know some people really like to go with a double clevis. This is what came with the boat so when we put as we put the new anchor in I'm going to stick with what we have but I may eventually switch to two clevises that are connected together. I don't know what the story is with this anchor here it's the one that we it's the one that came with the boat and it's not a traditional anchor So I don't know if it's the original one. I don't know anything about it or where it came from it's kind of an unusual style and I've never seen one like it So I have no idea if it performs well or not there we go if you don't know what a clevis is round you right here is a clevis and this is the bolt that holds it on and right now this part rotates and this is obviously connected to the anchor so but some people do is they'll put replace this part right here with a clevis just like this one So it's two clevises attached. For the time being we're gonna leave it the way it is
Fetching the new Fortress FX-125
So now what we got to do is go put this old anchor away in our lazarette. We're definitely gonna keep it as a backup or a stern anchor and fetch the new FX-125, bring it back out connect it to the clevis and pull it back up to the boat I'm just gonna walk down this way. I thought we already had it. We had a second anchor I think we have a little one. So now we'll have three anchors on the boat he's strong you just put a mark in our door I
Unboxing: why we chose the FX-125
know. All right. So here we are on the aft deck. Trisha and I got the new anchor on the boat last weekend here it is in the box. So we got a FX-125, which is a large, well-known Danforth anchor and there's a couple things that we really liked about it which was quite a few of our friends a couple that have our same boat more the same size boat said it does really well for them and the Bahamas and other places that they've anchored you can actually tweak or adjust this anchor for a hard or soft bottom So if you know you're gonna be in a sandy bottom you can actually adjust it and if you know you're gonna be in a rocky or a hard bottom you can adjust it in an independent different way. I researched this for two months or so read all kinds of forums watched all kinds of videos and at the end of the day, this is the anchor that we decided to go with, like I said based on friends recommendations and what I researched lucky for us. It is in pieces right now. So I'm gonna stop the camera for a second while we open this box and carry all the pieces to the front and then assemble it and reattach it to our boat via the clevis and pull it back up. I actually think we should just leave the camera rolling while you're unboxing that So I'm gonna leave it rolling
Wait, it's 69 pounds?
actually says it's 69 pounds on the box 69? It says to be 75. It says 69 pounds. Did you get the right one boat size, 69 to 150 feet. Okay, then we got the right one thank goodness there's no plumber's crack in this video. Do you need instructions? What? Do you need instructions? Yeah, we'll definitely look at it in a second to make sure we do it the right way. But that is a... that's a big anchor and it's heavy. It's actually 69 pounds overall and that's recommended for boats. I can see here on the side of the box, 69 to 150 feet. We're 74 feet, so we're kind of at the small range. I like having an oversized anchor for a boat that's recommended for a bigger boat. This is... it's not going to... it's not going to fit in our rollers. Yeah, well... No, it's going to look... So as you can see right here, this is where they're talking about the adjustable. So you would put it here for harder bottoms or pebbles, rocks, that kind of thing. And right here for soft mud, this is where we're going to keep it because the Bahamas is sandy, of course, and all the areas we would anchor around here are sandy. We don't have a lot of rock bottom. Usually that's more north. What did you say? We have a lifetime warranty on it.
Assembling it on the dock
45? 45. 22 and a half. There's the midpoint. So that goes through there and then they're going to go through either one of those and then you tighten those down. So you are doing... Soft mud. Okay and this is the part where it was very particular about the exact same length on both sides. Oh man. Alright. That is amazing. Yeah 21 and 21 and a half. So you need to do 21 and a quarter. Don't, don't. Okay there's 21. This is 21 and a half so it has to go... Oh right there. Right there. We'll be back. We had it the first time. Okay 21 and a quarter. 21 and a quarter. Okay so we got... Here. I'm gonna mark that. So the flukes I think slide in that. They do. Okay now it says install the mud palms. So these things. Well don't the flukes have to go on first?
"I have this backwards"
Do we have it the right way? Oh you know what maybe I have it backward. You know what I have this backwards. This is supposed to... No you don't. Yeah I think I think it is because this right here is where the fluke goes in. No you have it correct. You have it on the back end. Now the flat end is supposed to be on the outside and the flat end right now is on the inside. I have it backwards. Honey it's it's the same either way. No. See look where it narrows down. Oh you're saying this has to go. Yeah. Okay. So we gotta pull this out real quick. And now it's 21 21 and a quarter right. Yeah where my mark's at. Damn look at that the whole line. Do they fit? And then I should have a 14 millimeter wrench in there. I can't use this I don't think because it's too close. Yeah I'll need a 14 millimeter wrench. How did you get these in here? They're kind of a pain. Now the wrench, that's a socket. Is that what it calls for? No it's just what size it is. How do you know? Because I already tested it. Aren't you smart? You're just going to speed this section up aren't you? Probably. Oh you know what it is? It's that in a combination with it being in this groove. So you have it on backwards. Oh yeah that's right because the fins go. So that's what keeps it from. Then we I guess we have to take these off. We do. So that'll be the next step. So let's flip it around and get this other plate on. 21 and a quarter. So they had a bunch of they had kind of had an air show yesterday. That's why all the jets are. Here another one. I'm gonna give it one more. I think you got like the worst screwdriver. That's the first one I've seen. I'm a monkey using tools. I think that one's pretty tight but let me see if I can get one more small turn. Oh, I can. There we go. Okay that's as tight as I can go. Okay let it go. Okay all right. Hold it in there now. I can get it one more. Okay I should have done this on the other side. Okay let go. What are you doing? I'm giving myself a room to turn it because it's so tight in here. Okay this is the last part. Yeah. So we got to remove these. Yep. Yep that's it and then it said to double check the measurement. So let's see that. And slide the pole down towards me just an inch. Yeah I got 21 and a quarter. You want to check your side. Yep. I see what the groove is for. It's so that they both rotate at the same angle. So one's not facing one way and one fluke isn't facing the other way. So the boat's going to be pulling it this way and then when you when I back down it's going to sink those down into the mud because the chain's going to be holding it up this way. That's why that extra mud plate is there.
Getting it on the chain
So now I think it's for the fun part right? Yep. No this is the fun part. Okay. All right what's your plan? Basically we're going to flip this around this way so if you hold it right here. Okay. You'll attach it. This thing would definitely take your toe off if you dropped it on it. Yep. Too heavy. And then test it. Either way we have to do this again when we do the... We just got to make sure this eye can fit through the chain when we do that. And it was at that moment James (bleep) knew he had (bleep) up.
It doesn't fit the pulpit
All right so we're back. So we got the new anchor up. Anytime you do something like this on a boat you always find something that there's a problem with. Up behind here there's a stainless steel plate that comes like this and then the stainless steel shelf that kind of sits on the bottom there. I gotta have... My tin snips aren't thick enough. I do have a Dremel tool. I thought about using a Dremel tool but I have a buddy that helps us out with a lot of things. It's not Zach this time. It's Aaron. He's basically going to come out Monday or Tuesday and cut this stainless steel plate to match the thicker plate that comes right down here for support. And then what will happen is this entire anchor will be able to go about four or five inches further back and be a lot more secure. Sometimes there's no way to really know without doing it. So Trish and I assembled this whole thing. Got it up here. We're not going anywhere until maybe next weekend on the boat. So long story short they're going to cut a big U out of that. It'll slide up in there and it'll be perfect. This is a awesome upgrade for us. We had been meaning to do it for a while and we just hadn't gotten around to it. And then the only other thing that I'm thinking is we have a wire up there secures around the top of the windlass and kind of connects to the anchor chain. So it kind of helps hold it in there. We may add an additional chain support that's actually mounted in the pulpit only because one of my fears is this ever comes loose for whatever reason while we're underway. Maybe we're in rough seas and that actually comes down and goes underneath the boat and we travel over it. That would be a massive problem for us. So I want to avoid that. Right now the windlass is holding it, a wire is holding it and we may add a chain support to further hold
The clevis upgrade still to come
it. Oh and I should say the other thing that I might do: our clevis, could be which is what connects the anchor to the chain. Could be slightly bigger so it fits around there. And I saw a couple where it is more round shape at the end of the clevis so it would allow the clevis to be a little bit more free in its motion. So I will probably upgrade that. I'm looking forward to getting that cut and having the whole thing be in the right spot. So this is a big upgrade for us. Hopefully you can see how kind of easy it is if you ever think about replacing your own anchor. Thanks for watching another one of our videos. It was a pretty awesome anchor upgrade for us. If you enjoyed it please like and subscribe. That helps us out a great deal and we'll see you next time.