The Runaway Diesel We Couldn't Have Stopped
God forbid we had a runaway diesel and I needed to trigger the safety mechanism. These things pump a massive amount of water through the engines. They sound awesome.
Welcome Aboard Empire
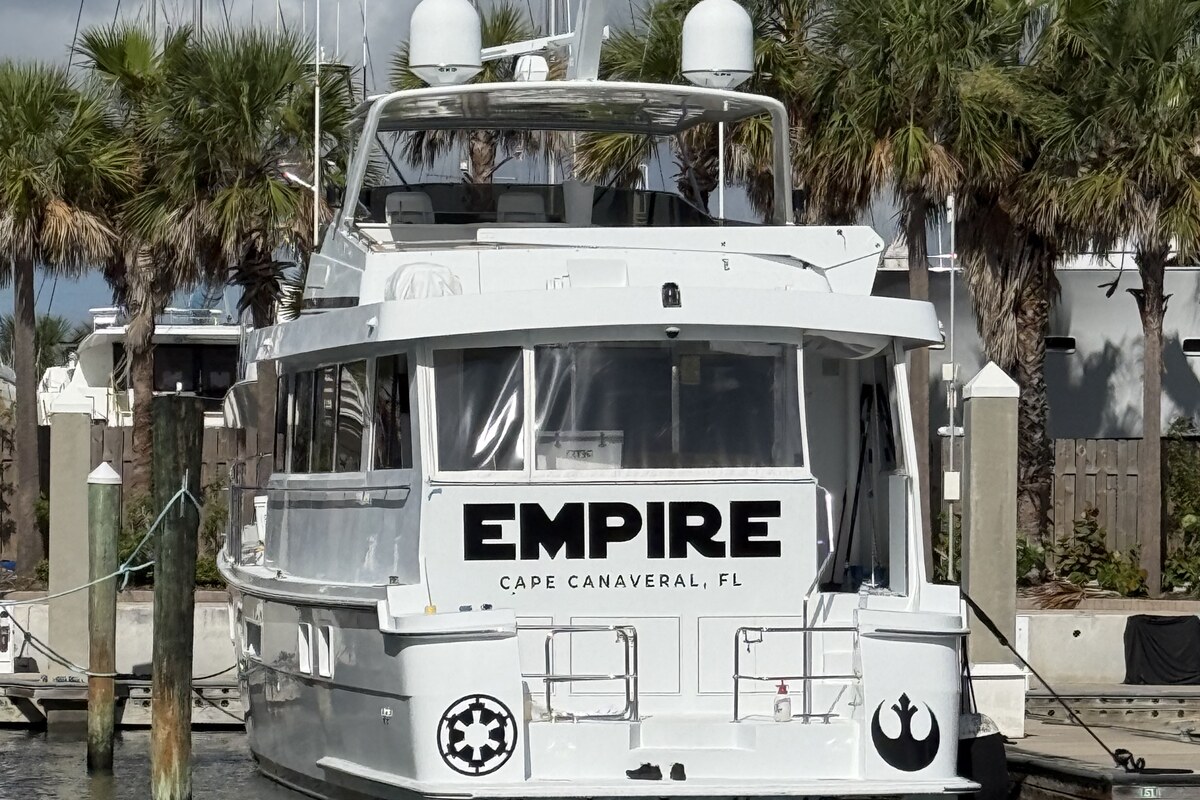
Hi, welcome aboard Empire, our 1998 74 foot Hatteras that we bought a little over two and a half years ago. We've done two other walkthrough videos to kind of catch up, catch you guys up to where we're at with things. I've had a lot of mechanical conversations in the comments. A lot of people have had really interesting comments or questions. So next week we're planning to actually take the boat out, weather permitting. So we'll go through all of our engine room checks and you guys will actually get to see us undock it, dock it and go out in the ocean and just have fun for four or five hours. Before we do that, because the weather is not so great today, what I'm going to do is kind of answer all the questions and comments and go through the engine room. More component by component so you guys know what we're looking at.
Twin Caterpillars: Mechanical, Not Computers
So we have two Caterpillar 3412 TAs. They're Cs. So the big difference between the C version of these engines and the E version of these engines is most of the functions on our motor are mechanical, not computerized. I really like that. I am super into computers, AI. I'm a software architect. I love technology. But when it comes to something that's going to get me home, I really enjoy the simplicity of mechanical. Versus computerized. What I'm going to do during this video is actually walk around this side of the engine, that side of the engine and just point out the things that are awesome and all the different components that we have so you guys can see everything that you might expect in a yacht engine room of this size. So as I was saying, we have two 3412 Caterpillars. They're TAs because they're twin turbo and they're after cooled. So right here you can see one turbo, the after cooler in the center with the marine power and the other twin turbo.
The Mechanical Brain
Here is kind of the heart of the engine. This is sort of a mechanical brain. I hope that I never have to open this. Certainly a normal mechanic should never open this. My mechanic said if this ever had an issue, it's beyond the average mechanic to fix it because there are more than 50 gears in there that all control timings and lots of other things. So if I did have an issue with this, I would send it off to Caterpillar that I've heard that from several people at this point. As you can see, these are 12 cylinder engines. You can see six lines going into the injectors here and six lines going into the injectors here.
This box on the front right here is a heat exchanger. So this is filled with coolant and right here we can see a coolant overflow tank.
The Water Heater That Gives Me Anxiety
Okay, so what we have next right here is a water heater. This is giant. It still works great though and actually works awesome. One thing we've thought about doing is replacing it with a tankless water heater. They've came a long ways and I know quite a few people that use them on boats at this point. The one thing that I have to look at is the amount of amps and volts that this uses versus the tankless that we would install. This thing gives me a little bit of anxiety when we're underway because if this bracket or the shelf that it's mounted on broke and this whole thing came crashing down on this engine, that would be a lot of problems. It's been here for 30 years. It has no signs of giving way. So I think we're okay. And as I mentioned or as I will mention when we get to the generator room, we have a compressor on the boat. So here is one of the fittings for the compressor. So if you're painting, you want to clean the engines, blow things off, you know, it's right here and I use it all the time.
See-Through Stabilizer Hatches
Trisha, if you come around here, what we have on this side, next to the starboard engine, is the starboard stabilizer. As we talked about in previous videos, we've redone that entire system. I installed plexiglass. One of the big things for me is when I'm doing hourly engine room checks when we're actually operating the boat, I want to stand about where Trisha is standing. Be able to look over here and see that there's nothing wrong with it.
A 30-Year-Old Watermaker
This is a 30 year old water maker. We're replacing this. We have a remote control panel up in the lower helm where we can turn this on and monitor it. When I first got the boat, we replaced all filters, unpickled it, which means we got it back running again. Got all the old water flushed out. It runs great. It produces around 50 parts per million for water, which for a 30 year old water maker is actually pretty awesome. Like some modern water makers won't go that low. The problem that we have with it is the motor that's behind here is a four cylinder motor. And when we opened it up, the oil was basically sludge. And when I say sludge, I mean, it looks like it came from Lake Okeechobee swamps. So two of the four cylinders are a little weak. It still runs. It still could produce water. She's just live past her prime. Currently have four 8D batteries on the boat. One powers the service side of the boat, one for each engine and one for the generators. There's two 8Ds here and two 8Ds in the exact same place on the other side of the motor. This is our main stabilizer unit. So one of the things that I often check during underway is how much fluid we have in it, hydraulic fluid, what the level is, and just monitor these fittings for any leaks. We've replaced about half of these fittings. They were not great when we got the boat, but they've now been fixed. So right here, we're looking at the pump for the water maker. Now, when we replace the water maker, that will also be replaced. And then the most, the modern water makers are actually a little bit smaller. So it would actually be cool to retain a little bit more space on the shelf. This is the battery charger for the boat. Whether we're on generators or shore power, this keeps all four 8Ds charged and topped off. Here's the exhaust riser for the starboard motor. It's not uncommon on these size boats to have a split riser. So actually half of the exhaust seawater and exhaust actually go out underneath the middle of the boat. So we can kind of see that here. And then the other half actually runs all the way to the back of the boat and comes out the exhaust that you can see. If we come over here, that's one of the filters for the water maker. And down here, you can see this is one of the shafts that come from the transmission. And that shaft is obviously attached to the propellers. And we have one big seawater intake for this engine.
Custom Exhaust Elbows
Show them the custom elbows that we had made. Yep, so we also mentioned this in another video. We did a fair amount of work on these exhaust elbows. So we have two of them for this engine. And right here is one of the custom ones that we had built. It's actually one solid piece custom made. So we should get two or three times the life expectancy out of the D'Angelo exhaust elbow that we replaced. And we also replaced these. So as you can see right here, we still have part of the D'Angelo exhaust. There's nothing wrong with it. So right here is one of the we talked about this in another video, too.
Lightning Took Out an ECM
One of our ECMs got damaged by lightning. This was the one right here. It was on the starboard motor. So that is a refurbished ECM. And now that we've gotten a little bit further, I'm kind of revisiting some of these rough areas like right here. We can see that this has definitely exceeded its lifetime. It just needs the boot replaced. So another thing that we're getting ready to do, this is the maintenance port for the engine. So if you connected this motor to a Caterpillar computer for diagnostics or other things, you would. This is where you would connect it. One of the things that we're doing is connecting both of these motors to NMEA 2000. So we'll actually be able to read all of this data that would come from this maintenance port on our Garmins. So I'm really looking forward to that. That's coming soon. So we have both of our aftercooler sent off recored and repaired. Over time, somebody had damaged the fins inside that. It wasn't damaged to the point that it was causing a problem, but it needed to be repaired. So both of those were removed from the boat, sent off, recored and retested. We also powder coated everything that came back on the boat. So one of my hard rules for these engines, if we take anything off of it, it either comes back on painted or powder coated. I prefer powder coating because it just go, it lasts a lot longer.
One interesting item that we had, and we didn't even know it until we came back, it was kind of a big problem.
The Emergency Shut-Off That Didn't Work
Right here is the emergency shut off, so if I press that button upstairs you can see that I just cut off air supply to the boat. This actually did not function with the button upstairs, so God forbid we had a runaway diesel and I needed to trigger the safety mechanism, we actually wouldn't have been able to do it. So let me reset this real quick, that way I can actually go start the motors. When we got here and we started breaking this engine down, one of the things that we realized is this starboard motor was only getting half of the air that it should have, which is a big problem for the motor. It did not exhibit any operating issues, the motor ran fine, it wasn't good that it was only getting half the air that it should have. Now the emergency button works upstairs, so for whatever reason we had to shut down the engine. There's a couple things that we could do, but the easiest thing to do would be to pull the lever upstairs, cut the air off, and the motor should shut down.
New Racors (Hidden Micro-Cracks)
One of the things that we also replaced, they were in rough shape, and we talked about it in one of our other videos, we replaced both Racor units here, so we have two Racor filters per motor. You can run on one or the other or both. When I run locally, I run the fuel through both fuel filters, it doesn't hurt anything, but when we do longer trips, what I will do is actually run it off one, keep the other one as a backup, just in case we got bad fuel or there was a fuel issue. Then I could simply turn on the other one, turn off this one, and replace it while we're underway. We replaced both of these because the older ones had micro cracks in the original plastic. The reason that we knew that is when I went to check on the Racors, do maintenance on these, I would unscrew this and it would have a very difficult time pulling the cap off. That's one of the easiest ways to know that you're getting air in the system somewhere. In our case, it happened to be the Racor units themselves. They're not cheap, but we feel a lot better knowing that they're replaced. As you can tell, I'm very big into the aesthetics, clean engine room, so they also look a lot better than the 30-year-old ones that were here before.
The Port Engine and 3.5-Inch Shafts
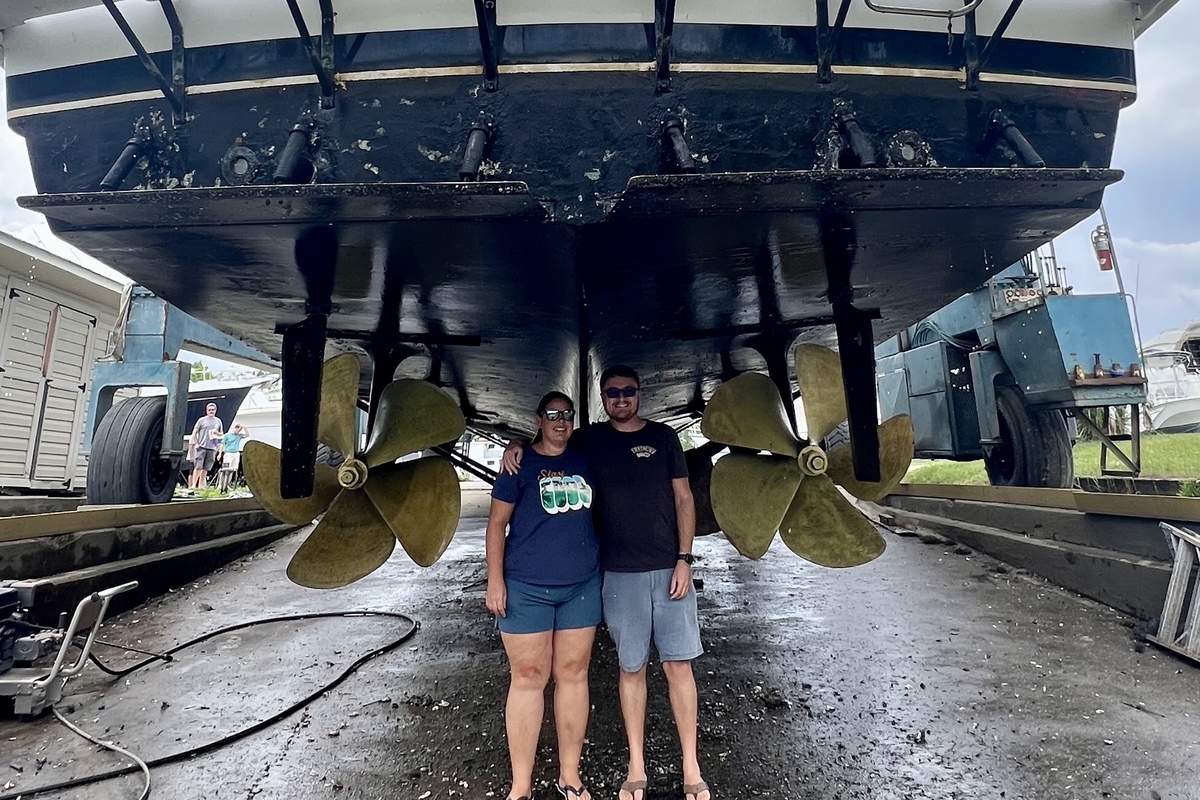
This is the rear of the port engine. As you can see, this is the shaft coming from the transmission and the main engine seacock on the port side. We have 3.5-inch shafts, which is quite large for a boat. That's what she said. That is what she said. Over here is the port side ECM. I need to buy one of these Caterpillar stickers for the ones that we replaced over there. The ECM that was on the starboard motor didn't have it, but I really like it. As I pointed out on the other side, this engine also has a maintenance line that we're going to connect to NMEA 2000. Both of these exhaust elbows were replaced just like we did on the other side. We've talked about it before. Generally, if we do something to one side, we almost always do it on the other side. Two turbos, an after cooler, 12 cylinders.
1,500 Gallons and the Fuel Manifolds
We have four fuel tanks on this boat. As you can see here, we have a forward, forward mid, aft mid, aft keel. It holds a total of 1,500 gallons. One of the cool things that Hatteras did is they added these two manifolds for the starboard and port engine. I can tell each engine which fuel tank to pick up from and which one to return the fuel to. Another useful thing is if you're going to, say you were traveling and three of the four tanks were near empty, while the motor is running, you can actually pick up the remaining fuel from three tanks and put it all in the fourth one. We have the same thing on the port side. I can tell the motor which fuel tank to pick up from and which one to return the fuel to. Here on the top valve, you can see that we can send the oil being pulled from the motor, the generators or the main engines, to the deck, to an engine room hose, which is what we did last time. We also have this tank option. I've done a little bit of research on it and it would appear that we have an extra tank on this boat where we can send used oil to. Last time we changed the oil, I kind of got into investigating it, but I never quite followed it all the way through. If somebody knows about that, I would love to hear a comment about it and to say, "Hey, that's what it's for."
The Hydraulic Bow Thruster
So we have a hydraulic bow thruster and that runs off this port engine. That's what this is right here. Other than taking care of some corrosion, repainting it, the one thing that we added here is a special unit that allows this to separate. So as you can see, we have one water pump belt here and we have a spare water pump belt here. If that water pump belt broke and I used my spare, without removing this, it would be impossible to get a new hose on there. What this unit does is it allows this to separate. It presents a gap and with that gap you can put a new water pump belt on there. One of the things that we always do throughout the boat is we always try to think of our future selves. So if we use that main water pump belt that's on there now, had to use the spare and for some reason that belt broke too, with that unit we could actually add more water pump belts. And we have spare water pump belts on board. So that was a smaller item that we added to just increase the ability for us to fix things when we're not at home port.
Fire Suppression
In this engine room we have what's commonly called a Fireboy system, which is basically just a CO2 system. So if there was a fire in here, it could put out the fire on its own. This is a CO2 bottle that controls all of that. There's pressure operated switches and there's sensors on the ceiling that detect when a fire happens. Over here we have the port stabilizer. We, as we mentioned, redid this system and placed plexiglass over it so that when we're underway without actually stepping over the motor, you could just view it and make sure that everything's okay. Right here we have the other two 8D batteries. This is the fuel pump for the port engine. So when we were changing oil, this is the pump that makes it happen along with that manifold. It kind of had an interesting story.
The $2,500 Pump We Didn't Replace
So we think that this Mach 5 water pump is about 30 years old and original of the boat. It had some issues. It was making funny noises. It wasn't performing well. It wasn't getting up the pressure. So we were almost about to replace it. And we talked to a Headhunter, described all of our symptoms, and they said, "No, actually there's nothing wrong with that pump. What's wrong with it is the accumulator tank." Luckily we tracked down the original manufacturer of it and replaced this accumulator tank. After that accumulator tank was replaced, our fresh water system and that water pump works fantastic. We were going to do some maintenance on this Mach 5 water pump, but the Headhunter representative that we were talking to, he was an engineer, basically said, "Any money spent on that at this point is not worth it." They are kind of expensive to replace, somewhere in the neighborhood of $2,500. So he said, "If it's working great now, let it run for a few more years, maybe five, and when it starts to have issues, just replace it."
So right here we have a steering pump, hydraulic reservoir pressure system. With a normal bicycle pump, you can increase the pressure. And on here, of course, they say what the pressure should be. In this case, it's 20 to 25. I'm actually low. This is something that I need to do. So what I would do is unscrew this nipple, let the pressure out, add more hydraulic fluid to this unit, put this back on here, pump it back up to 25 psi, and I'm good to go. We have hydraulic engine controls for both throttles and gear. This one controls that. Over in this corner, we have split risers, of course, just like we showed on the starboard side, where half the water comes out underneath the boat, half the water comes out the back. We're in the process, the final stage, hopefully, of getting our hydraulic bow thruster back up and running.
Bow Thruster Lightning Damage
It got damaged during a lightning strike near the boat. We've spent a lot of time tracking down the software for this microcontroller, which controls the electronic system for this hydraulic bow thruster. We replaced two sensors. We completely pulled this off, redid it. It was in extremely rough shape. I'll see if I can find a picture. The other thing that we did, and this was kind of something that had us miss, surprisingly, and I've only found one or two items on the boat where they did this, this thing was actually very, very close to the ceiling, and inside here is a filter. So, it being so close to the ceiling, you couldn't actually service the filter in this. So, we, you know, by this time, you guys know that we're pretty big on maintenance. So, when we pulled this off, redid this, replaced this valve, replaced all the hoses, we remounted it lower so that it's actually serviceable. So, on here is a gauge that tells us when we need to replace or service the filter. Now that it's much lower, it's super easy to replace that filter anytime we need to. We're still finishing a little bit of work on this hydraulic bow thruster. We'll clean this up, remount that, and get everything back to the way it should be. I've started painting from this corner and working my way out.
Repainting the Engine Room
I plan to repaint the entire engine room. I just started in that corner, and I started in a few other places. One of the next things that I'm doing in this engine room is these screens right here, which make sure that no debris gets into our engine room. They're old, most of the rivets are broken, so I'm getting those refinished, and we're replacing the filters in there. They're pretty ancient, gross. I'm looking forward to having these vents done, and as you can see over here on the starboard side, that one needs done too. It's not a big project. What I'm doing is sandblasting the aluminum and repainting it white so that it matches the white that we're going everywhere else in the engine room. One of the things that's on my list to do is this boat had two DirecTV antennas. It had an old phone system. Of course, we don't use DirecTV anymore. We have Starlink, and we use streaming services. We're removing the two DirecTV antennas and removing a lot of this old cabling and paneling. I have some ideas for this space, which includes adding some additional shelves. One thing that we've thought about doing, because we have all this space above the engines, is adding two hang-down shelves where we can store various tools, fluids, or other maintenance items that come in handy to have right here when you're done here. I can't wait to get those. It'll just help me keep this room a lot more organized. We did replace all the lighting in this engine room. It kind of looked like an ancient dungeon in here when we first got the boat. But I like bright engine rooms, bright white engine rooms. I'm not going to touch on everything in this engine room that would take more time than you probably want to spend watching it.
Why Owners Should Know Their Engine Room
I'm a big proponent of owner-operators like us being active in the engine room. By being active in here, I've learned what every single thing in this engine room does. That's really, really important, because when you're out in the ocean, you're far away from home, you're far away from help, you need to know which everything in your engine room does. And oftentimes, if you have that knowledge of what everything in your engine room is, problems don't just randomly start on a boat. There's usually signs that something's happening, whether that's corrosion, a fluid leaking, a fitting being cracked, whatever it might be. I always encourage people that I talk to be active in your engine room. It will save you a lot of time and money. And you can catch problems early. We catch a lot of problems early. So before it becomes a big deal, if you catch it early, it's usually a small deal. Be proactive with your maintenance so you catch it early and not have to spend thousands of dollars. Because usually fixing something that's just starting to break or just starting to have issues is far less expensive than doing the major repair later when something failed.
The Generator Room
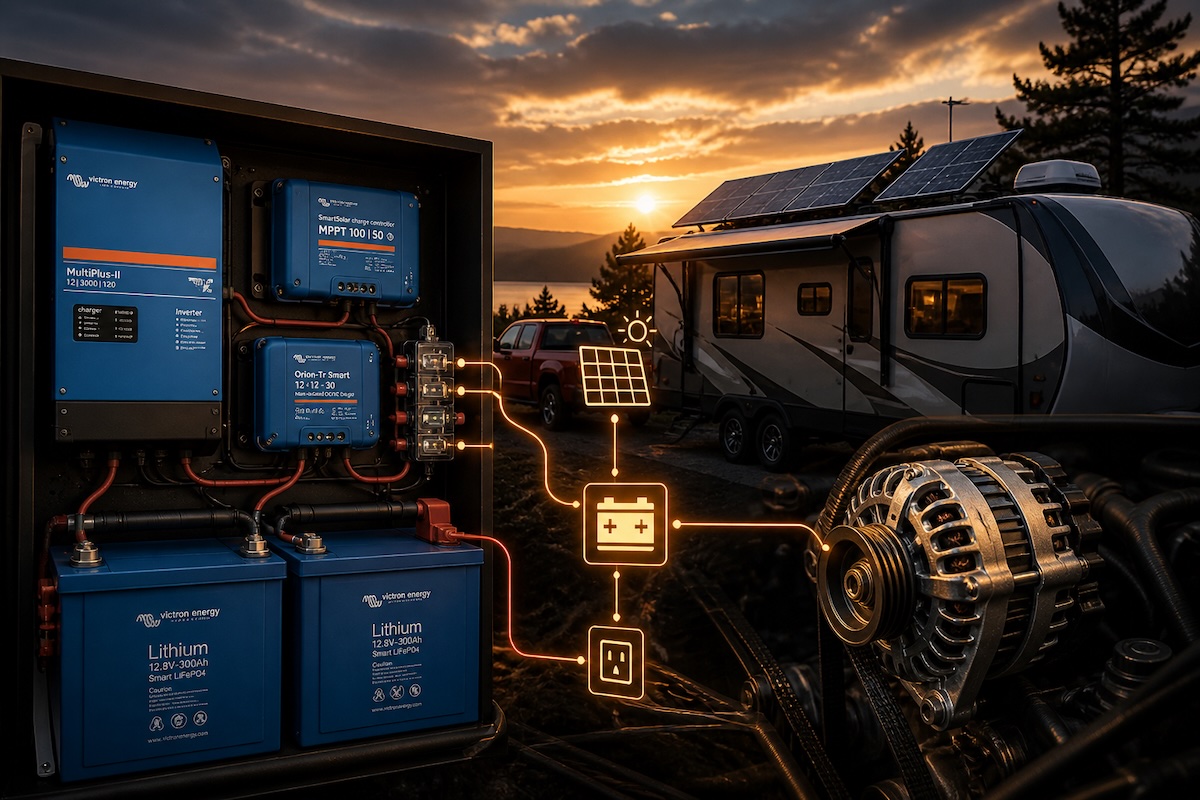
Here we are in the forward engine room or generator room as we call it. Behind me is seven AC compressors. So these are all the AC air conditioning compressors for the boat. We've replaced all of them but one down here at this point. Kind of hard to film because it is actually quite a bit of rooming here, but it's a little harder to show. We have two 20 kilowatt Onan generators. So over here in this corner I have special plans for this. When they designed this boat they really intended for you to always be running a generator or be hooked up to shore power. Actually you do run the generators most of the time. So even if we were anchored out for two days we would most likely run the generators the entire time. I am kind of researching some Victron equipment, lithium batteries, and I have plans for this particular corner. We have an air compressor that we replaced.
Air Compressor and Our Star Wars Horn
So originally there was a giant Coleman compressor here from 1998. We since replaced it with a much more modern one, just a DeWalt one that we got from Lowe's. This also powers our ship's horn and our Star Wars truck horn. Over here we have two isolation transformers, one for each 50 amp cable. Basically this will boost power, clean it up, and remove any stray voltage. If we go behind this generator where we are looking now, I can get completely behind there which is awesome. I am in the process of replacing these covers right now. So I don't know if you can see it, but they have these clips that go on the bottom that kind of help hold the door in place. They have been long since broken. I have replaced I think six of them at this point and I still have about six more to go. Behind this generator it is the forward bathroom and behind this generator is the stairs. So if you lift up those stairs you have access to the back of this generator too. So one of the things that Hatteras did really really awesome with this room is they just thought through how somebody would maintain it and how somebody would want to get access to everything. So having 360 degree access to both generators is awesome.
Generator Trouble on the Trip Home
So when we first bought the boat and brought the boat from Wilmington, both of these generators struggled the entire time. When we bought the boat we had an open ticket to either get them repaired or replace them. That was part of the deal, one of the reasons that we bought it. However when we were bringing it down we could not keep them running. So they had two problems. So where the fuel pickups are, where the generator connects to the fuel tank, both fittings were just ancient and old and essentially what was happening is it would allow air to get into the line and because it allowed air to get into the line the fuel pump struggled. So we actually replaced the fuel pumps on each one twice just bringing her home. And one of the other things that we did here that kind of contributed to that problem as well is the Racors were actually oversized for these generators. So these are completely new Racor units and they're properly sized so we want one size down. We replaced that pretty early on and ever since we replaced the fuel pickups and these Racors these generators have ran like a charm. And you can see over here we replaced that Racor for this generator too. We're actually in the process of replacing that CO2 bottle right there. It's a little bit more corroded on the bottom than we like so we're just going to replace it. It's original to the boat and as you can see here marine ACs if you don't know are generally water cooled so we have pickups that pull water into the boat, run them through here. So over there in the corner you can see a manifold where all the water goes.
Starting the Engines
Alright before we start the motors one thing I should mention I always keep it by the helm is have a heat temperature gun. When I go do my engine room checks I like to take the temperatures of before and after the heat exchangers and several other items. This is invaluable. While we have gauges for it and we're about to have digital data coming to our NMEA 2000 Garmin network it's always good to check it manually. What did you just do? Hatteras 12 point alarm system because the motors aren't running says that the oil pressure is low which is exactly what's happening. So I just silenced it and as we see when I start the motors that will go away.
So as we can see the oil pressure light went away from the port engine, oil pressure went away from the starboard engine so now they're running. Noise isn't that bad up here. No it's very quiet. Hatteras did a great job of insulating all the living areas from the engine room noise and heat.
How Loud Is It Inside?
Here we are in the salon with both engines running. The doors to the engine's room are closed and it's a comfortable sound level. It's not that loud at all.
They Sound Awesome
Okay, so as I was saying in the engine room we have split exhaust risers. So half the water comes out very near where the engine is actually at on the boat and the other half comes back out right here. As you can see, the pressure builds up and then lots of water comes out. These things pump a massive amount of water through the engines.
And if you can't hear them, they sound awesome. They're class zero diesel engines. That's just what marine diesel engines are. I love the sound of them and we're just idling. Thank you for coming along in our engine room and generator room tour. I hope you enjoyed it. As always, please like and subscribe and we'll see you next time on Empire.